
DJI Phantom 1: A practical guide to specs, setup, flight, and upgrades

Key Takeaways
The DJI Phantom 1 is a simple, older ready-to-fly quadcopter that rewards careful inspection and conservative flying.
- Expect an aircraft built around basic GPS-assisted flight rather than modern automation.
- Treat every used battery, propeller, motor, and connector as a safety-critical part.
- Confirm the transmitter, receiver, compass, and flight modes before attempting a higher flight.
- A lightweight action camera may be practical, but every payload changes balance and endurance.
- Maintenance, weather judgment, and realistic expectations matter more than chasing upgrades.
DJI Phantom 1 overview and key specifications
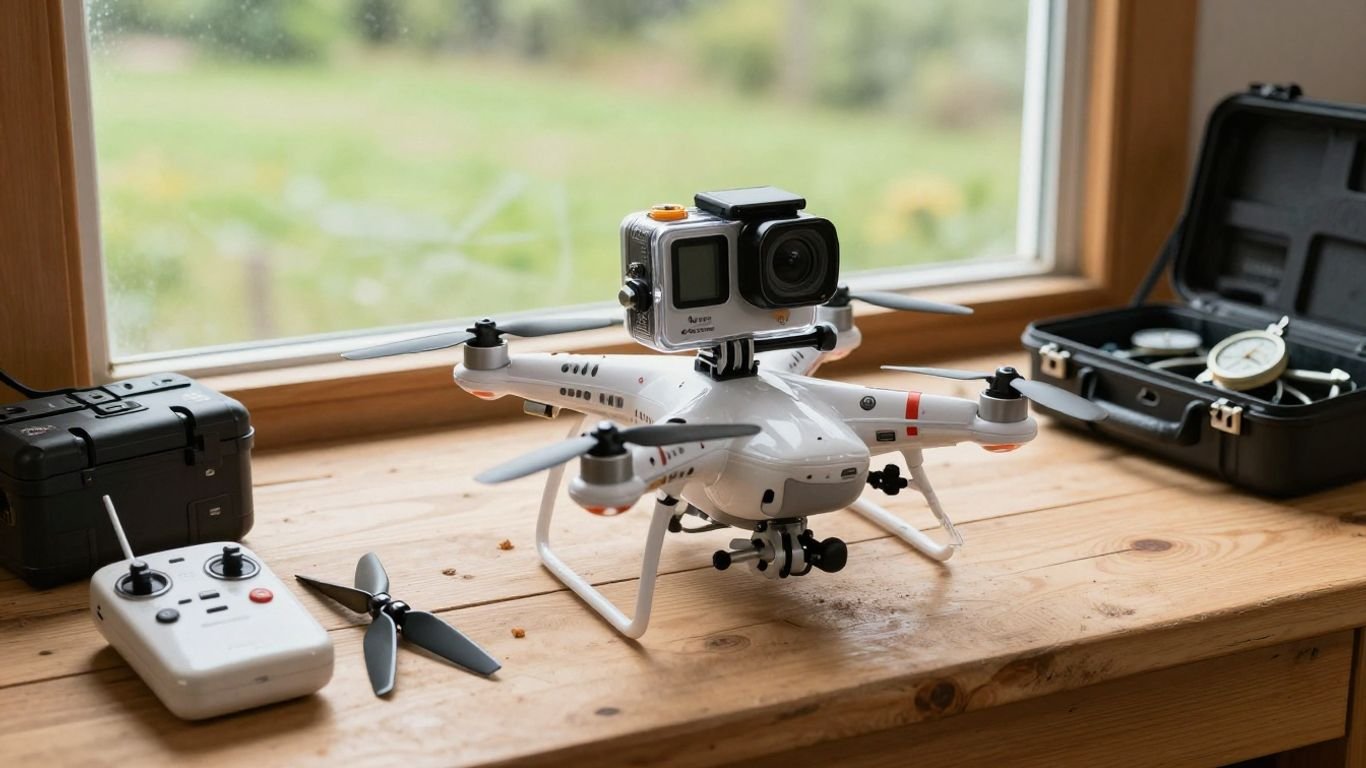
The DJI Phantom 1 arrived when aerial photography was moving from specialist hobby equipment into a more approachable consumer format. It was sold as a small, ready-to-fly aircraft, and its integrated white quadcopter design helped make this type of drone familiar to a much wider audience. The original aircraft did not include a built-in camera, but it could be fitted with an optional mount for a GoPro camera. The Phantom 1 product history is useful context for understanding why this older model still attracts hobbyists.
What made the Phantom 1 significant
The Phantom 1 mattered because it reduced the number of separate decisions a new pilot had to make. Instead of assembling a complete aircraft from individual motors, electronics, and a frame, the buyer received a compact platform intended to fly with a supplied remote controller. That accessibility helped establish the familiar consumer quadcopter form factor.
It is still best understood as a product of its time. There is no modern obstacle sensing, automated subject tracking, or built-in camera system to soften mistakes. Its appeal today is the directness of the experience: the pilot has to understand the machine, the environment, and the limits of an older control system.
Camera, gimbal, and payload compatibility
The original Phantom 1 had no integrated camera. An optional mount could hold a GoPro HERO camera, making the aircraft useful for basic aerial photographs and video, but the resulting setup was more exposed to vibration than a modern camera drone. A fixed or lightly damped mount also means the camera angle and framing require more planning before takeoff.
The aircraft’s payload should be treated as a practical experiment, not an invitation to add accessories indefinitely. A camera, mount, cable, or landing-gear modification consumes some of the available lift and changes the center of gravity. For planning shots, a videography production guide can help with location scouting, equipment preparation, and production-day organization, even though the aircraft itself remains a relatively simple platform.
Flight controller, GPS, and stabilization features
The Phantom 1 used a GPS-enabled NAZA-M autopilot system. Its GPS-assisted flight was designed to help the aircraft hold position and resist drifting in ordinary conditions, while the control system also provided an attitude mode for more direct manual handling. GPS is assistance, not a substitute for keeping the aircraft in sight and knowing how to fly without it.
The sensors and compass need a clean, sensible setup. Nearby metal objects, electrical interference, a poor calibration, or an unfamiliar launch site can all make an old aircraft behave differently from the previous flight. Give the aircraft time to acquire satellites, but never assume that a GPS indication makes a crowded or windy location safe.
Battery, range, and flight-time expectations
The aircraft was powered by a 2200 mAh LiPo battery and was commonly associated with roughly 15 minutes of flight time under suitable conditions. That figure is an estimate, not a promise for a battery that has spent years in storage. Cold temperatures, wind, a camera payload, repeated hard acceleration, and an aging pack can reduce usable time considerably.
Published range figures should also be treated cautiously when evaluating a used example. Radio conditions, local rules, obstructions, antenna condition, and the pilot’s ability to maintain visual contact all matter. Plan to land with reserve power rather than trying to extract every possible minute from an old battery.
What to check before buying a used DJI Phantom 1
A used Phantom 1 can look clean while hiding brittle plastic, tired batteries, or an unreliable radio link. Ask for a clear account of how it was stored, whether it has crashed, and which parts are included. The used Phantom 1 listings can help establish what sellers commonly disclose, but photographs and a live test remain more valuable than an optimistic description.
Airframe and motor condition
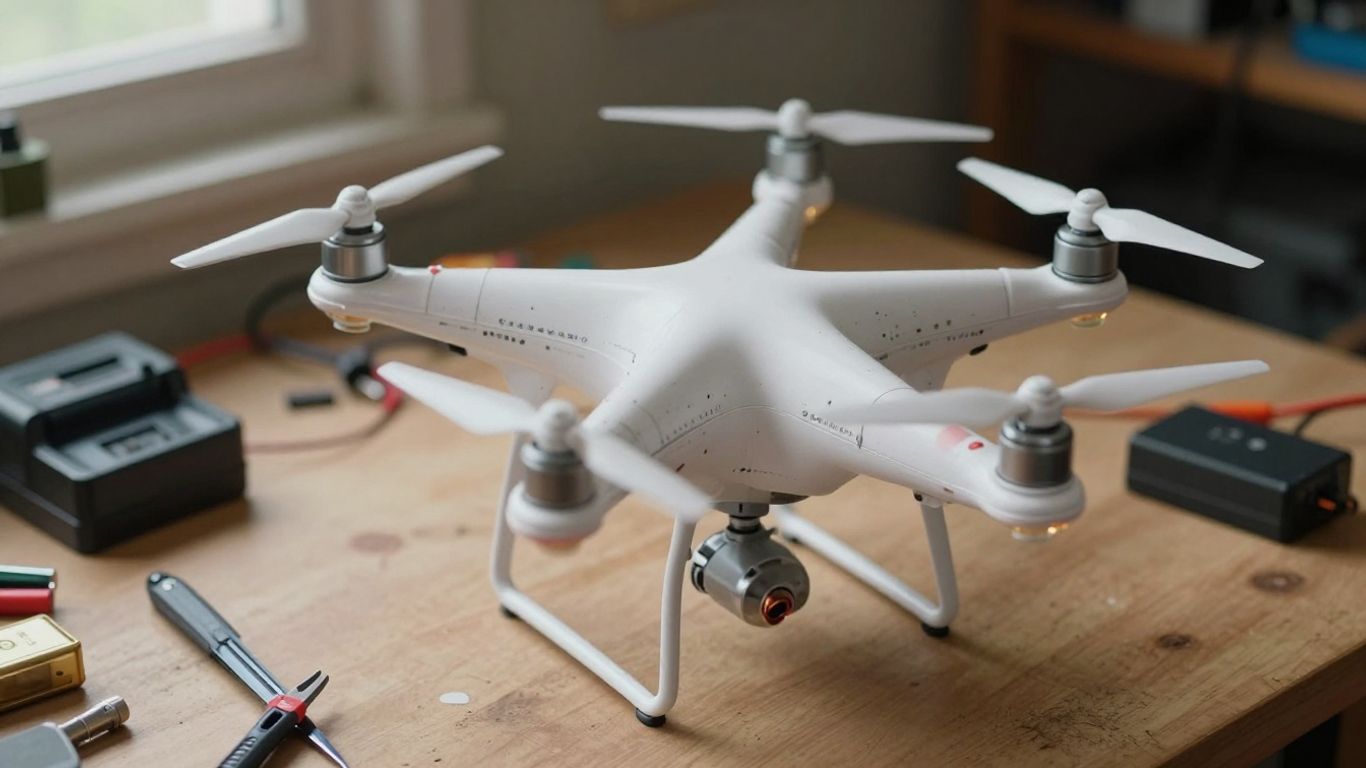
Start with the shell, arms, landing gear, motor mounts, and propeller hubs. Look for hairline cracks around screw holes, whitening in stressed plastic, stripped threads, and signs that a previous repair relied on glue alone. Turn each motor gently by hand; roughness, scraping, or unusual side-to-side movement deserves attention before a flight test.
Inspect the propellers for chips and bends, then check whether the motor shafts appear straight. A seller may call a cosmetic mark harmless, but a crack near an arm or motor can spread under vibration. It is usually better to buy an incomplete aircraft with a sound frame than a fully accessorized one with hidden structural damage.
Battery health and charger compatibility
Battery condition is often the largest unknown. Look for swelling, crushed corners, damaged leads, corrosion, or a connector that has been repaired. Do not charge a visibly swollen or physically damaged LiPo pack. Ask whether the charger is the correct type and whether the battery can hold voltage under load, rather than accepting a claim based only on the charger light.
A replacement battery may cost enough to change the value of the purchase. Include that expense, plus a safe charging bag or suitable storage arrangement, in the budget. Never substitute a pack solely because its plug fits; voltage, chemistry, capacity, dimensions, and discharge capability all need to be appropriate.
Remote controller and receiver checks
The transmitter should power on cleanly, hold its controls at center, and communicate with the aircraft without unexplained dropouts. Test the throttle, yaw, pitch, and roll inputs gradually while the propellers are removed. Check the battery compartment for leakage and inspect the antenna, switches, gimbals, and cable connections.
A proper outdoor test should include a short hover at a safe height, with a spotter watching the aircraft and the pilot watching for control interruptions. If the aircraft responds late, wanders despite calm conditions, or enters an unexpected failsafe behavior, stop testing and diagnose the radio system before buying.
Included accessories and replacement parts
Inventory the package before agreeing on a price. Useful items may include the transmitter, charger, battery, propeller set, landing gear, camera mount, manuals, tools, and spare fasteners. Missing small parts can be surprisingly difficult to source for an older model, so a complete kit may be worth more than a cheaper bare airframe.
For storage and transport, also examine the case and any aftermarket wiring. A clean, reversible installation is preferable to loose adapters and taped connections. This is the same practical mindset used when checking any equipment intended for a property or vehicle: a LANLocksmith.com service directory is unrelated to drones, but its emphasis on verifying local professional coverage is a useful reminder not to confuse a listing with a completed inspection.
How to set up the DJI Phantom 1
Setup should happen at a table before it happens outdoors. Read the available manual, identify every switch and indicator, and charge the flight battery and transmitter batteries separately according to their instructions. The Phantom 1 downloads and manuals are the most sensible starting point when an original booklet is missing.
Registering and charging the aircraft
Before connecting power, inspect the battery compartment and confirm that the pack is seated without force. Charge on a nonflammable surface in a supervised area, and disconnect the pack when charging is complete. A battery that becomes hot, puffs up, or smells unusual should be removed from service rather than tested in the aircraft.
Older equipment may not behave like a current app-connected drone, so do not assume that a contemporary registration workflow applies. Keep a written record of the aircraft, transmitter, battery age, and any repairs. That simple log makes it easier to spot a pattern when flight time or reliability begins to change.
Installing propellers and landing gear
Fit the landing gear firmly and check that it sits evenly. Install only the correct propeller on each motor, following the markings or manual rather than relying on memory. Tighten propellers securely, but avoid excessive force that can damage the hub or motor shaft.
After installation, rotate each propeller by hand and check for contact with the shell, wires, or landing gear. Remove the propellers before working on motors, calibrating controls indoors, or troubleshooting a startup problem. Many avoidable injuries begin with a powered aircraft that was treated like a model sitting harmlessly on a bench.
Calibrating the compass and flight controls
Perform compass calibration outdoors, away from vehicles, reinforced concrete, large speakers, and other metal or magnetic objects. Follow the documented sequence carefully and watch the indicator behavior. If calibration repeatedly fails, changing locations is safer than repeating the same procedure beside the original source of interference.
With the propellers removed, confirm that the control sticks move smoothly and return to center. The aircraft should respond consistently to commands, with no unexplained input or twitching. Calibrate only when the aircraft is stable and undamaged; calibration cannot repair a bent shaft, failing sensor, or loose connection.
Preparing the transmitter and GPS mode
Install fresh transmitter batteries and verify the mode switches before connecting the flight battery. Know which position corresponds to GPS-assisted flight and which selects attitude control. A first outdoor test should begin in the most predictable mode available, with enough open space to respond if the aircraft does not hold position.
Allow the system to complete its startup checks and acquire a suitable GPS signal where applicable. Do not lift off while still guessing about the switch positions. A small label on the transmitter or a written checklist can prevent a rushed mistake, especially when returning to an aircraft after several months.
How to fly the DJI Phantom 1 safely
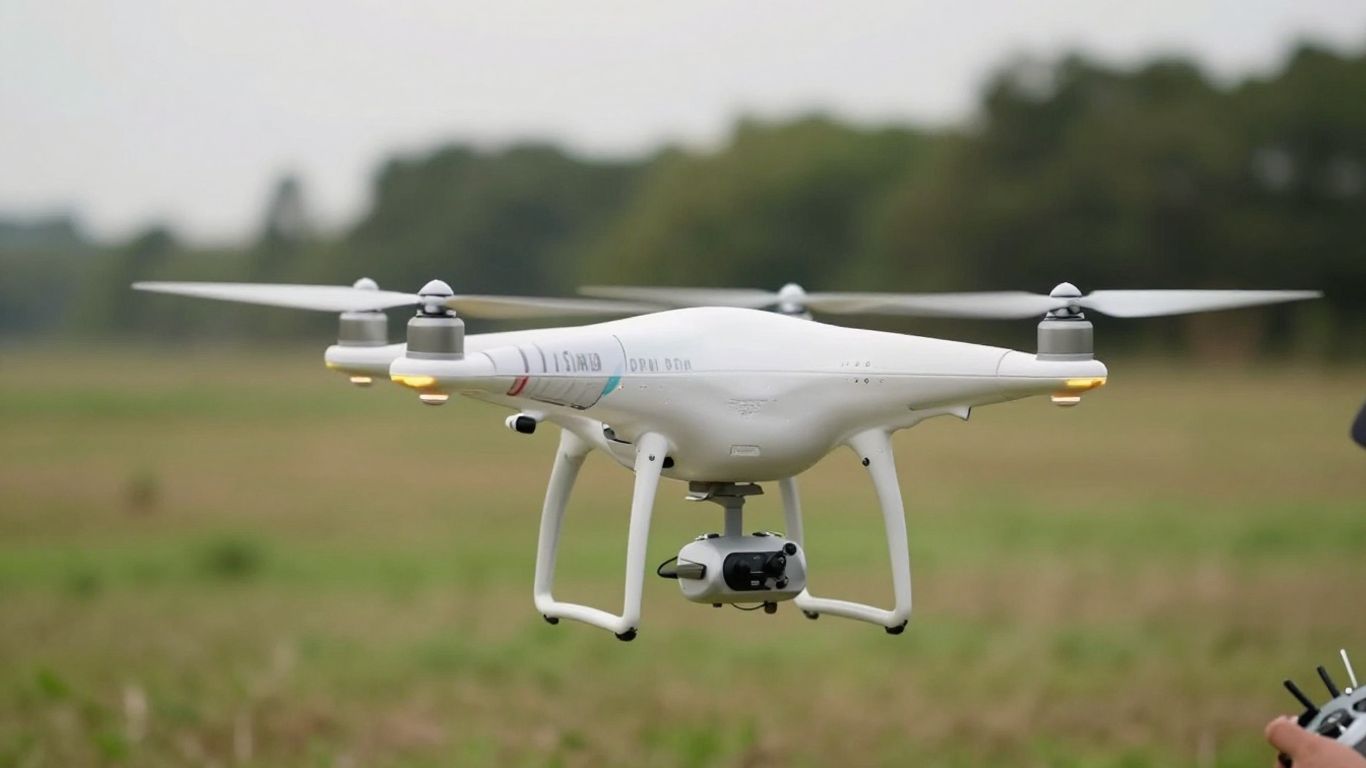
Safe flight begins with accepting that an older aircraft offers fewer layers of protection. Choose a legal, open site, keep people and animals away from the operating area, and maintain visual contact throughout the flight. For a broader refresher on basic takeoff, hovering, and control inputs, this first-flight checklist is a helpful companion.
Performing a preflight inspection
Walk around the aircraft before every launch, even if it flew perfectly the day before. Confirm the propellers, battery latch, landing gear, shell, motor wires, transmitter, and compass condition. Check the weather and identify a landing area before arming.
A compact preflight sequence is easier to follow when it is written down. These are the checks worth keeping visible:
- Battery is secure, undamaged, and adequately charged.
- Propellers are correct, tight, and free from cracks.
- Transmitter controls and switches are in the expected positions.
- The compass and GPS indications are normal for the location.
- The takeoff and emergency landing areas are clear.
That list is brief enough to use every time, and it catches the kinds of small omissions that become serious once the motors are turning. If anything feels uncertain, postpone the flight rather than improvising in the air.
Taking off, hovering, and landing
Place the aircraft on level ground with the nose facing a known direction. Arm and lift smoothly, then pause in a low hover while checking for drift, vibration, unusual sounds, or a rapidly falling battery indication. Avoid testing forward flight immediately; a stable hover gives you the first useful evidence that the aircraft is ready.
Land with plenty of reserve power and descend gradually. Keep the aircraft level during the final approach, and do not catch it by hand unless the procedure is specifically understood and the environment makes it genuinely safe. After landing, disarm before touching the aircraft or moving near the propellers.
Managing GPS, attitude, and failsafe modes
GPS-assisted mode can help the aircraft hold position, while attitude mode places more responsibility on the pilot. Learn the difference in a calm, open area at low altitude. If GPS behavior becomes unreliable, the correct response is controlled flying and landing—not repeatedly switching modes without knowing how the aircraft will react.
Failsafe behavior should be understood before it is needed. Know what the aircraft and transmitter do when the signal is lost, and keep enough space for that response. Do not treat a failsafe as a guaranteed recovery system; trees, buildings, weak batteries, and an incorrect home position can all complicate the result.
Flying in wind and changing weather
Wind affects a small, older quadcopter quickly. Gusts can increase current draw, make a GPS position appear less stable, and leave less power for the return flight. Start into the wind when practical so the aircraft is not forced to fight the strongest headwind with a depleted battery.
Avoid rain, fog, thunderstorms, and conditions where visibility may disappear during the flight. Moisture can reach electronics, while changing light can make orientation difficult. If the weather is questionable on the ground, it will not become more forgiving simply because the aircraft has taken off.
Understanding the aircraft’s limitations
The Phantom 1 is not a modern autonomous imaging platform. It has no built-in camera in its original form, limited protection against pilot error, and an endurance figure that depends heavily on battery condition and payload. Those limitations are manageable when the flight is short, local, visible, and planned around a generous landing reserve.
A useful rule is to keep the aircraft within the part of the sky where you can identify its nose and attitude. Visibility is a safety tool, not merely a legal obligation. If orientation, battery status, or radio behavior becomes uncertain, land while you still have choices.
DJI Phantom 1 camera and upgrade options
Upgrading an older airframe can be satisfying, but each added part introduces weight, wiring, vibration, or another point of failure. Begin with the footage you actually want and compare that goal with the aircraft’s lifting ability and control system. Sometimes the most sensible upgrade is a fresh set of propellers and a reliable battery rather than a more elaborate camera assembly.
Choosing a compatible action camera
The original platform could use an optional GoPro mount, so a compact action camera is the most historically appropriate payload direction. Check the camera’s dimensions, mounting method, battery behavior, and weight before attaching it. A camera that fits physically may still be unsuitable if it makes the aircraft sluggish or shifts the center of gravity too far forward.
Avoid assuming that a newer camera automatically improves the result. Vibration, wind, lens angle, and the mount often matter as much as resolution. Make a short test recording over an empty area, then inspect for rolling-shutter wobble, propeller shadows, and horizon tilt before attempting a longer shoot.
Balancing the aircraft with a camera payload
Mount the camera on the centerline whenever possible and keep cables tucked away from propellers and moving parts. With the battery and camera installed, check that the aircraft does not visibly lean while resting level. A small imbalance can force the motors to work unevenly throughout the flight.
Test the added load with a low hover, not a distant climb. Listen for strained motors and watch the battery indicator closely. If the aircraft needs excessive throttle to remain level, remove the payload; a camera is never worth compromising the aircraft’s ability to land safely.
Adding a gimbal or vibration-dampening mount
A gimbal or damped mount may improve footage, but it also adds mass and can create a pendulum effect. The mount must be secure without blocking the battery, compass, landing gear, or cooling paths. Soft materials that are too loose can make footage worse by allowing the camera to swing.
Keep the first test short and fly gently. Sudden stops, sharp yaw inputs, and wind expose poor mounting choices quickly. If the footage is still unstable after balancing and reducing vibration, the platform may simply be beyond what the accessory can correct.
Replacing propellers, motors, and other components
Replace worn parts with compatible components and keep the work area organized. Match propeller type and direction, use appropriate fasteners, and inspect motor wires for chafing before closing the shell. After any motor or frame repair, perform a propeller-off bench check followed by a restrained hover.
Do not mix unknown parts just because their dimensions look similar. Differences in weight, connector type, shaft length, or electrical demand can affect flight behavior. A repair that is easy to reverse is preferable to drilling new holes or permanently modifying the airframe.
Considering modern alternatives to upgrades
There is a point where repeated repairs cost more time and money than the aircraft is worth. If the goal is dependable aerial video, compare the full upgrade budget with a newer, purpose-built camera platform. For background on the progression of integrated aerial cameras, the DJI Inspire 1 review offers a useful historical comparison without changing what the Phantom 1 can do.
The older aircraft still makes sense as a learning project or occasional hobby machine. It makes less sense when the brief requires dependable automation, refined stabilization, obstacle awareness, or long endurance. Make that decision before buying a pile of accessories.
DJI Phantom 1 troubleshooting and maintenance
Troubleshooting is easier when one variable changes at a time. Record the battery used, flight mode, weather, payload, and symptoms, then inspect the simplest mechanical causes first. Older electronics can remain serviceable, but they do not become safer through optimism or repeated unstructured tests.
Diagnosing unstable flight and drifting
Begin with the propellers, motors, landing gear, and frame. A chipped propeller, bent shaft, loose motor, or cracked arm can create vibration that looks like a software problem. Remove the payload, use a known-good battery, and test in calm air before changing settings or performing another calibration.
If the aircraft drifts only in one mode, compare that mode with the other documented flight mode at a safe height. If it drifts in every mode, stop flying and inspect the physical structure and sensors. A recurring wobble is a reason to land, not a behavior to correct with increasingly aggressive stick inputs.
Fixing GPS, compass, and calibration problems
Move away from cars, steel structures, reinforced concrete, and power equipment before recalibrating. Confirm that the aircraft is level when required and follow the correct sequence without rushing. Repeated failure in several clean locations may indicate a sensor, wiring, or control-system fault.
Keep the transmitter and aircraft away from loose metal tools during setup. Also check whether the problem appears only at one site. A location-specific issue suggests interference or magnetic disturbance, while a problem that follows the aircraft points more strongly toward its equipment.
Addressing short flight times and battery issues
Short flights commonly trace back to an aged battery, cold conditions, wind, or extra payload. Compare performance using a known-good pack and no camera, then inspect battery temperature and physical condition. Do not continue using a pack that swells, drops voltage sharply, or becomes unusually hot.
Land earlier than the nominal flight-time figure suggests. Older batteries can appear acceptable at rest and fail under load, so a voltage reading alone is not a complete health check. Store serviceable packs according to their battery instructions and keep damaged ones isolated for proper disposal.
Updating firmware and finding support resources
Before attempting an update, identify the exact aircraft and controller hardware and read the available instructions. Do not interrupt power during an update or install files intended for another model. The official-style Phantom 1 download center is a better reference point than an anonymous file mirror.
Support information for older products may be scattered across manuals, archived pages, and careful user communities. Cross-check advice against the aircraft’s actual revision. Guides about modern drones can explain general principles, but their apps, batteries, and safety features should not be assumed to apply here.
Storing the drone for long-term reliability
Remove the flight battery from the aircraft, clean dust from the shell and motors, and store the drone somewhere cool, dry, and away from direct sunlight. Keep propellers flat or protected from bending, and avoid placing heavy objects on the landing gear. Check stored batteries periodically rather than leaving them forgotten for years.
Before the next flight, inspect connectors, look for corrosion or pests, and repeat the complete setup and calibration process. A long-rested aircraft deserves the same caution as a newly purchased used one. If you are also maintaining a workspace, even a general ant control guide can reinforce the value of sealing entry points and checking stored equipment regularly, though drone electronics require their own specific inspection.
Conclusion
The DJI Phantom 1 remains most rewarding when approached as a hands-on, limited aircraft rather than a modern automated camera drone. Verify the used example carefully, treat batteries and propellers seriously, calibrate in a suitable location, and fly conservatively. With those habits, this early quadcopter can still offer a useful lesson in radio control, flight planning, and responsible aerial photography.
Frequently Asked Questions
Is the original aircraft supplied with a built-in camera?
No. The original version did not include a built-in camera, although an optional mount could be used with a compatible action camera.
How long can an older quadcopter battery last in flight?
A published estimate is only a starting point. Age, temperature, wind, payload, battery condition, and flying style can all shorten the usable flight time.
Should a swollen lithium-polymer battery be charged?
No. A swollen, crushed, leaking, or unusually hot battery should be removed from service and handled through an appropriate battery-disposal process.
Why does a quadcopter drift after calibration?
Possible causes include wind, damaged propellers, a bent motor shaft, a cracked frame, sensor problems, magnetic interference, or an unsuitable calibration location.
Is GPS enough to make an older drone safe?
No. GPS assistance can help with position holding, but the pilot still needs visual contact, a clear flight area, battery reserve, and a plan for control or failsafe problems.
What should be tested before buying a used drone?
Inspect the frame, motors, propellers, battery, charger, transmitter, receiver link, switches, and included parts. A cautious hover test is valuable if it can be performed in a safe, open area.
Is upgrading an old drone always worthwhile?
Not necessarily. Compare the cost and complexity of batteries, mounts, cameras, and repairs with the reliability and features needed for the intended work. Sometimes replacement is more practical than extensive modification.