
Drone Mapping Made Easy: Your First Steps
Thinking about getting into drone mapping? It might seem a bit complex at first, but honestly, it’s more straightforward than you might imagine. This guide is all about getting you started with the basics, covering what you need to know and do for your very first mapping mission. We’ll break down drone photogrammetry for beginners, making it easy to follow along. So, grab your drone, and let’s get this mapped out!
Key Takeaways
- Drone mapping uses drones with cameras to take many overlapping pictures of an area.
- Software then stitches these pictures together to create detailed maps and 3D models.
- For beginners, using a DJI drone and simple mapping apps can make the process easier.
- Planning your flight path, checking airspace, and understanding basic flight parameters are important first steps.
- After flying, you’ll process the images to get your final map or model.
Understanding Drone Photogrammetry for Beginners
So, you’re curious about drone mapping and want to get started? It’s not as complicated as it might seem, especially with today’s technology. Think of it as a modern form of introduction to aerial surveying. Instead of relying on planes or satellites, we use drones to capture images from above. These images are then pieced together to create detailed maps and 3D models. This process is called photogrammetry, and it’s the backbone of most drone mapping operations. The goal is to turn a collection of photos into usable, accurate data.
What is Drone Mapping?
Drone mapping is essentially the process of using unmanned aerial vehicles (UAVs) equipped with cameras to collect imagery of an area. This imagery is then processed using specialized software to generate various outputs. These can include orthomosaic maps (which are like super-accurate aerial photos), 3D models of terrain or structures, and elevation data. It’s a way to get a bird’s-eye view with a level of detail and accuracy that’s hard to achieve otherwise. This technology is changing how we approach tasks like land surveying, construction monitoring, and even agricultural analysis.
Key Terminology in Drone Mapping
Getting into drone mapping means learning a few new terms. Here are some common ones:
- Orthomosaic Map: This is a high-resolution 2D map made by stitching together many drone photos. It’s corrected so that the scale is consistent throughout, making it good for measurements.
- Photogrammetry: This is the core technique. It’s how software takes overlapping photos and figures out the 3D shape and location of things.
- Point Cloud: Imagine a massive collection of tiny dots, each with its own 3D position. This is a point cloud, and it’s the raw 3D data that software uses to build models.
- Ground Control Point (GCP): These are specific points on the ground with known coordinates. Adding GCPs to your data helps make your maps and models much more accurate, especially for professional surveying.
- Geotagging: This is simply the process of attaching location data (like latitude and longitude) to each photo the drone takes. It’s vital for accurate mapping.
The magic of photogrammetry lies in the overlap. By taking many pictures of the same area from slightly different angles, the software can calculate depth and create a 3D representation. This is why planning for sufficient image overlap is so important when you’re setting up a flight.
Benefits of Drone Mapping
Why use drones for mapping? Well, there are quite a few advantages.
- Speed and Efficiency: Drones can cover large areas much faster than traditional ground-based methods. This means less time spent in the field.
- Cost-Effectiveness: For many projects, using a drone is significantly cheaper than hiring manned aircraft or employing large survey crews.
- Access to Difficult Areas: Drones can easily fly over rough terrain, hazardous sites, or tall structures that would be difficult or dangerous for people to access.
- High-Resolution Data: Drones equipped with good cameras capture incredibly detailed imagery, leading to more precise maps and models. This is key for getting started with drone data.
- Improved Safety: By reducing the need for personnel to be in potentially dangerous locations, drone mapping increases worksite safety.
Essential Equipment for Your First Mapping Mission
Alright, so you’re ready to get your hands dirty with drone mapping. That’s awesome! But before you can start creating those cool maps and 3D models, you need the right gear. Don’t worry, you don’t need to break the bank on the most high-tech stuff right away. A solid basic setup can get you pretty far.
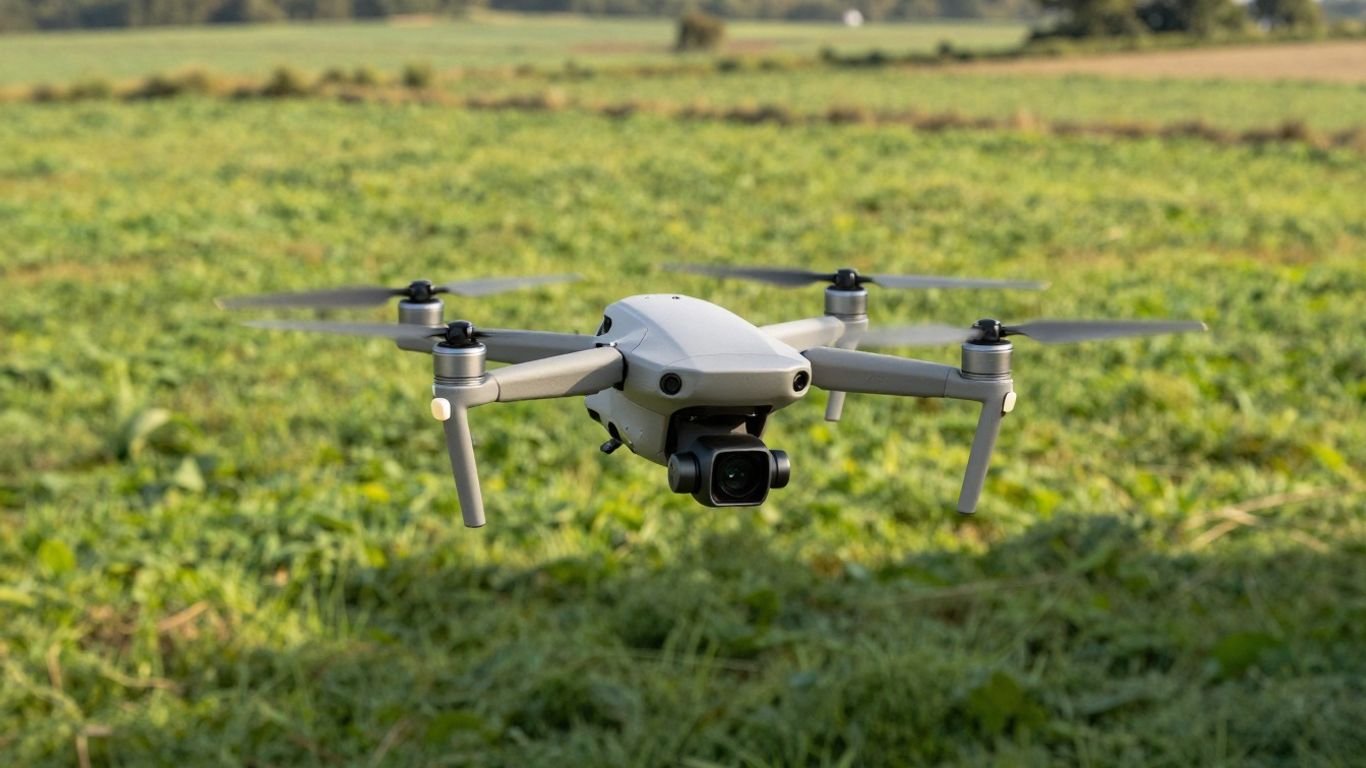
Selecting the Right Drone
When it comes to drones for mapping, not all of them are created equal. For beginners, sticking with a reliable brand like DJI is usually a safe bet. Models like the Phantom or Mavic series are popular for a reason. They’re relatively affordable, come with decent built-in cameras, and have tons of support from various apps. The key is to find a drone that’s stable, has a good quality camera, and is easy to fly. You’ll want a drone that can handle autonomous flight plans, which is pretty standard on most modern mapping drones.
Choosing Your Mapping Software Ecosystem
This is where the magic happens after the flight. You’ll need a software solution that includes an app for planning your flight and a platform for processing the data. Think of it as your digital toolkit. For starting out, something straightforward is best. Apps like DroneDeploy or Pix4Dcapture are popular choices. They help you plan your flight path, and then you upload the images to their web-based tools to stitch them together into maps and models. It’s like putting together a puzzle, but way cooler.
Necessary Accessories for Enhanced Accuracy
While the drone and software are the stars of the show, a few accessories can really make a difference, especially if you need your maps to be super precise. For instance, if you’re aiming for centimeter-level accuracy, you might look into drones with RTK capabilities. This technology uses real-time GPS corrections to boost precision. Even without RTK, using Ground Control Points (GCPs) – markers placed on the ground that you identify in your photos – can significantly improve the accuracy of your final map. Don’t forget extra batteries; mapping flights can drain them quickly! A good tablet or smartphone to run the flight planning app is also a must-have.
Here’s a quick rundown of what to consider:
- Drone: Stable, good camera, GPS.
- Flight Planning App: For automated flight paths.
- Processing Software: To turn images into maps/models.
- Tablet/Smartphone: To control the app.
- Extra Batteries: You’ll need them!
- GCPs (Optional): For higher accuracy.
Remember, the goal is to collect good, clean data. The best equipment in the world won’t help if the images are blurry or the flight path is all over the place. Focus on getting the basics right first.
Planning Your Initial Drone Mapping Flight
Alright, so you’ve got your drone ready and you’re itching to start mapping. Before you even think about taking off, a little bit of planning goes a long way. This is where you lay the groundwork for a successful mission, turning a potential headache into a smooth operation. Think of it as drawing a map before you go on a treasure hunt – you wouldn’t just wander around, right?
Defining Project Goals and Scope
First things first, what exactly are you trying to achieve with this mapping flight? Are you surveying a small construction site, checking the progress of a field, or maybe just getting some cool aerial shots of your property? Knowing your goal helps you figure out the details. For a beginner drone mapping guide, it’s best to start small. Maybe a simple site mapping project, like a backyard or a small park. You’ll want to define the area you need to cover. This is your scope. Using a drone mapping app, you can often draw this area right on a map. It’s super important that the area you draw in the app matches the real-world area you want to map. Old satellite images can sometimes be misleading, so if you’re unsure, it’s a good idea to double-check the boundaries on-site before you fly.
Checking Airspace Restrictions and Permissions
Nobody wants to get into trouble with the authorities, so before you fly, you absolutely need to check the rules. This means looking up airspace restrictions. Are you near an airport? Is it a no-fly zone for any reason? You can usually find this information on government aviation websites or through specific drone apps. For simple drone site mapping, you might be in the clear, but it’s always better to be safe than sorry. If you’re flying over private property, make sure you have permission from the owner. It’s just good practice and avoids awkward conversations later.
Setting Key Flight Parameters
Now for the technical bits. You’ll need to tell your drone how to fly. This involves setting parameters like altitude and overlap. Altitude is how high the drone will fly. Higher altitudes mean fewer photos but less detail. Lower altitudes mean more photos and more detail, but it takes longer and uses more battery. For easy drone survey techniques, a good starting point might be around 10-20 meters (30-60 feet) for a small area. Overlap refers to how much each photo covers the same area as the previous one. You typically want a good amount of overlap, usually around 70% in front and 60% from the sides. This helps the software stitch the images together properly. Most drone mapping software will help you set these, and some even have pre-set plans for common tasks. For example, you can use tools like DroneDeploy’s web application to plan your flights ahead of time.
When planning your flight, remember that the goal is to get good data. This means consistent lighting, no sudden changes in weather, and making sure your drone’s camera settings are appropriate for the conditions. Don’t try to map in heavy rain or strong winds, it just won’t work well.
Here’s a quick rundown of what to consider:
- Area Size: Start small for your first few flights. A 100×100 meter (300×300 ft) area is a good size.
- Altitude: Balance detail with flight time. Lower is more detail, higher is faster.
- Overlap: Aim for 70% front and 60% side overlap for good stitching.
- Flight Path: Most apps will suggest a grid or lawnmower pattern, which works well for most mapping tasks.
Getting these parameters right is key to using drone mapping software effectively and getting the results you want without a lot of hassle.
Executing Your First Autonomous Flight
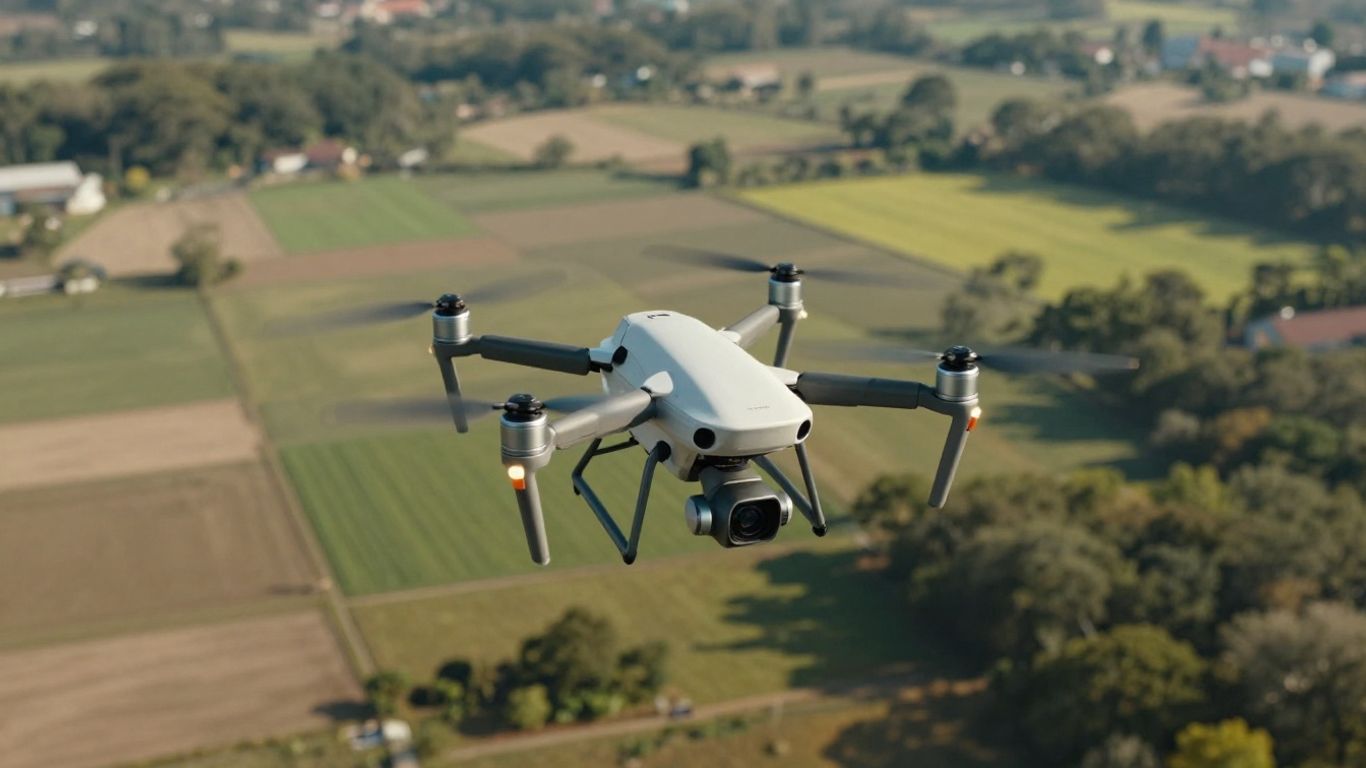
Alright, you’ve planned your mission, picked your gear, and now it’s time for the drone to do its thing. This is where the magic of autonomous flight really shines, taking the guesswork out of capturing the data you need. It’s not just about hitting ‘go’ and walking away, though. You’re still the pilot in command, responsible for the drone and the data it collects.
Performing Pre-Flight Checks
Before you even think about launching, a thorough pre-flight check is non-negotiable. This isn’t just a formality; it’s about safety and data integrity. Think of it like checking your tires and oil before a long road trip. You want to make sure everything is in good working order.
Here’s a quick rundown of what to look at:
- Drone Condition: Give the drone a visual inspection. Check for any cracks, loose propellers, or damage to the arms. Make sure the battery is securely seated and fully charged.
- Remote Controller & App: Ensure your controller is charged and paired with the drone. Open your mapping app and confirm the flight plan is loaded correctly and matches your intended area. Double-checking the flight path on the app against your actual location in the field is a smart move.
- Environment: Assess the weather. Is it too windy? Is rain expected? Are there any unexpected obstacles like new construction or power lines that weren’t on your map? Remember, even though the flight is autonomous, you’re responsible for avoiding hazards. For tasks like inspecting power lines, understanding the drone’s capabilities in various conditions is key [dac1].
- Camera Settings: While the app controls the flight path, it usually doesn’t adjust camera settings. Make sure your camera is set to capture good quality images – check focus, exposure, and white balance. You don’t want to process a whole flight only to find the images are blurry or too dark.
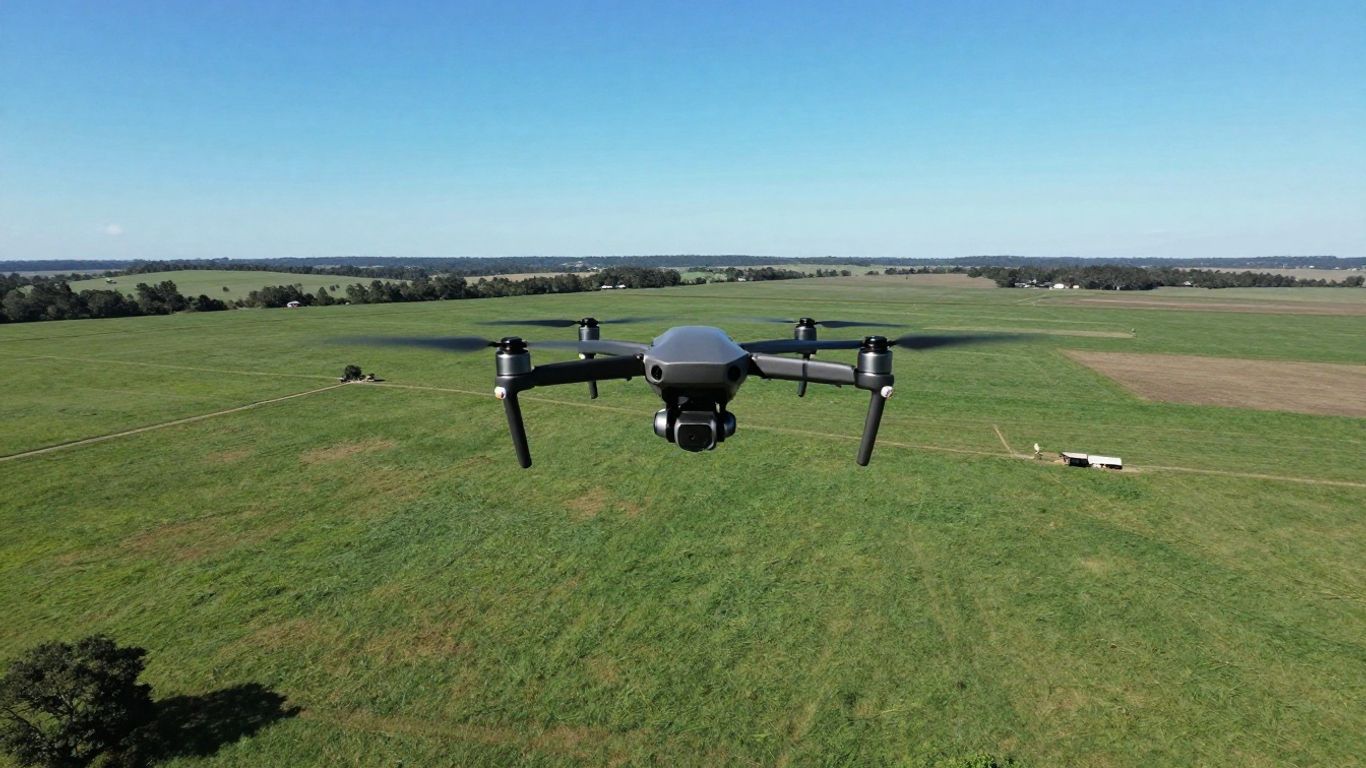
Supervising Autonomous Flight Paths
Once the pre-flight checks are done and you’ve initiated the flight, the drone will take off and follow the programmed route. Your job now shifts to active supervision. You need to keep an eye on the drone’s progress and be ready to intervene if something unexpected happens.
- Monitor Progress: Watch the drone’s position on the app’s map. Is it following the planned path accurately? Are there any deviations?
- Observe the Drone: Keep the drone in your visual line of sight as much as possible. Listen for any unusual sounds. If you see anything concerning, be prepared to take manual control or issue a return-to-home command.
- Intervention: If the drone encounters an unexpected obstacle or deviates significantly from its path, you might need to pause the mission, take manual control, and then either resume the flight or land safely. It’s better to abort and replan than to risk a crash.
Ensuring Optimal Data Capture Conditions
Capturing high-quality data is the whole point, right? Several factors influence this, and you have some control even during an autonomous flight.
- Lighting: Consistent, good lighting is best. Overcast days are often ideal because they provide diffused light, minimizing harsh shadows that can complicate processing. Avoid flying during times with rapidly changing light, like sunrise or sunset, if possible.
- Altitude: The flight altitude you set during planning directly impacts image resolution and overlap. Flying too high might result in images that lack detail, while flying too low can increase flight time and data volume significantly. Finding that sweet spot based on your project’s needs is important.
- Overlap: The software relies on significant image overlap (typically 70-80%) to stitch images together. The autonomous flight plan should account for this, but it’s good to be aware of it. If you’re mapping complex structures, consider adding extra manual shots from different angles after the automated flight is complete to improve 3D model quality.
Remember, even with autonomous flight, your awareness and readiness to act are key. The technology is impressive, but human oversight is still the most critical component for a successful mapping mission.
After the flight completes, the drone will typically return to its takeoff point or land automatically. Don’t forget to review your captured images as soon as possible, ideally while still in the field if time permits. This allows you to catch any issues, like missed areas or poor image quality, and potentially re-fly before you leave. This quick review can save you a lot of headaches later on.
Processing Your Aerial Data
Okay, so you’ve got all those images from your drone flight. Now what? This is where the magic happens, turning those raw pictures into something useful. It’s not as complicated as it sounds, honestly.
Transferring Collected Imagery
First things first, you need to get those photos off your drone’s SD card and onto your computer or into cloud storage. Don’t just dump them all in one folder, though. It’s a good idea to sort them out, maybe create a new folder for each flight. This makes finding the right images later way easier. If you can, take a quick look at the photos while you’re still in the field. Spotting any blurry shots or pictures of the sky early on can save you a lot of headaches during processing. You don’t want those messing up your final map.
Understanding Photogrammetry Software
This is the main tool for turning your images into maps and 3D models. Basically, the software looks at all the overlapping photos and figures out where everything is in 3D space. It then stitches them all together. There are tons of options out there, from simple cloud-based services to more complex desktop programs. Some are really straightforward – you just upload your images and let it do its thing. Others might need a bit more tweaking to get the best results. For beginners, starting with a user-friendly option is probably best. You can explore different drone data processing software to see what fits your needs.
Analyzing Initial Outputs
Once the software has done its work, you’ll get your results. This usually means an orthomosaic – which is like a super-accurate, flat aerial photo – and maybe a 3D model of the area you mapped. Take a good look at these. Are they complete? Do they look right? This is your chance to check the quality before you start measuring things or sending it off to someone else. Sometimes, clients just want the raw map, and they’ll have their own experts look at it. Other times, you might be asked to do some basic measurements yourself.
Remember that the goal is to create a usable product. If the orthomosaic has gaps or the 3D model looks wonky, it’s not going to be very helpful. Double-checking your work here is key.
Here’s a quick look at what you might get:
- Orthomosaic: A geometrically corrected aerial image. Think of it as a map you can take measurements from.
- 3D Model: A digital representation of the terrain and structures, often a point cloud or mesh.
- Digital Surface Model (DSM): Shows the elevation of the ground plus any objects on it, like buildings and trees.
- Digital Terrain Model (DTM): Represents the bare earth’s elevation, with objects removed.
It’s pretty cool to see your data come to life like this. Don’t be afraid to play around with the outputs and see what you can learn from them. This is where the real value of drone mapping starts to show.
Delivering and Sharing Your Mapping Project
So, you’ve got your drone data all processed and looking sharp. Now what? It’s time to get those results into the hands of whoever needs them. This is where you package up all your hard work into something useful and easy to understand.
Preparing Client-Ready Deliverables
Think about who you’re giving this to. Are they tech-savvy engineers who want raw data, or maybe someone who just needs a clear overview? Tailor your output to match their needs. The goal is to make your findings accessible and actionable.
Here’s a breakdown of common deliverables:
- Orthomosaics: These are like super-accurate, flat aerial photos. They’re great for showing the overall layout of an area.
- 3D Models: These give you a realistic, digital representation of the terrain or structures. You can often spin them around and look at them from different angles.
- Point Clouds: For those who need really detailed spatial information, a point cloud is a collection of data points in 3D space.
- Reports: Sometimes, a simple written report summarizing key findings, measurements, or observations is needed.
It’s a good idea to check with your client beforehand about what format they prefer. Some might want files they can import into their own software, like GIS or CAD programs. Others might be happy with a link to a web viewer.
Sharing Your Orthomosaics and 3D Models
Getting your data out there can be done in a few ways. For smaller projects, you might just email the files. But for larger datasets or when you want to share interactive models, cloud platforms are your best friend. Services like Google Drive, Dropbox, or specialized drone data platforms make it easy to upload and share links. This way, your client can access the data anytime, anywhere.
When you’re sharing, make sure the file sizes are manageable for the intended delivery method. Large files can be a pain to download or upload, so consider compressing them if necessary or using a service designed for large file transfers.
If you’re using a platform like DroneDeploy, they often have built-in sharing features that allow clients to view and interact with the models directly in their web browser, which is pretty neat.
Next Steps for Advanced Projects
Once you’ve mastered the basics, there’s always more to explore. You might look into integrating Ground Control Points (GCPs) for even higher accuracy, or perhaps exploring different sensor types like thermal or LiDAR for specialized applications. The world of drone mapping is constantly evolving, and there are always new techniques and technologies to learn. For instance, understanding the differences between photogrammetry and LiDAR can open up new project possibilities.
Don’t be afraid to experiment with different software and workflows to see what works best for you and your clients. The more you practice, the more efficient and professional your final deliverables will become.
Ready to Take Flight?
So, you’ve taken your first steps into the world of drone mapping. It might seem a little daunting at first, with all the talk of apps and processing, but as we’ve seen, getting started is pretty straightforward. You don’t need to be a tech wizard or have the most expensive gear to get some really cool results. Just grab a decent drone, pick a simple app, and find a nice open space to practice. The key is to just get out there and try it. You’ll learn a ton with each flight, and before you know it, you’ll be creating your own maps. It’s a fun skill to pick up, and who knows where it might lead?
Frequently Asked Questions
What exactly is drone mapping?
Drone mapping is like taking a bird’s-eye view of an area using a drone with a camera. The drone flies around, taking lots of pictures that overlap. Then, special computer programs put all these pictures together, like a giant puzzle, to create a super detailed map or even a 3D model of the ground or a building. It’s used for lots of things, like checking how a construction site is coming along or mapping out a farm.
Why would someone use drone mapping instead of regular maps?
Drones can get to places that are hard for people to reach, and they can cover large areas much faster than someone walking around with measuring tools. This makes it cheaper and quicker to get really accurate information. Plus, the maps and 3D models give you a much better picture of what’s going on, helping people make smarter decisions.
What kind of drone do I need to start mapping?
You don’t need the fanciest drone to begin. Many popular drones, like some DJI models, work great for basic mapping. The most important things are that the drone can fly steadily, has a good camera, and ideally, has GPS so we know where each picture was taken. Some drones have special features for even more accuracy, but you can start without them.
How do I actually make a map with a drone?
It’s a process with a few key steps. First, you plan your flight path using an app to make sure the drone covers the whole area and takes pictures that overlap enough. Then, you fly the drone, either by controlling it yourself or letting it fly automatically along the planned route, capturing images. After the flight, you upload all the pictures to special software on a computer that stitches them together into a map or 3D model.
What software is used for drone mapping?
There are several software options available. Some are apps you use on your phone to plan the flight and control the drone, like DroneDeploy or Pix4Dcapture. Then, there’s other software, often run on a computer or in the cloud, that takes all the pictures and turns them into maps and 3D models. These processing programs are what do the heavy lifting to create the final product.
What can I do with the maps and models I create?
Once you have your map or 3D model, you can use it for many things! You can measure distances, calculate the size of piles of dirt, track how a building is progressing, or even see how healthy crops are. You can share these detailed visuals with clients or coworkers to help everyone understand the project better and make informed choices.